separating iron filings
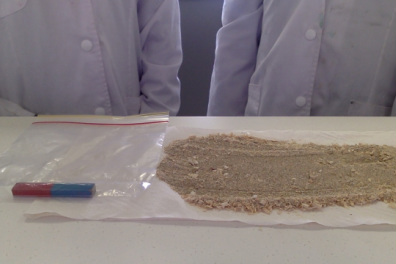
Aim: Separating the iron fillings from the mixture.
Materials: -Magnet
-Mixture of sand, salt, iron fillings and sawdust.
-Plastic bag
Method: 1.Pour the mixture onto the table and spread.
2.Place a plastic bag over the mixture.
3.Use magnet to lift up any iron fillings, about 1cm above the mixture.
4.Place the iron into a pile.
5.Repeat step 2 and 3 if only some of the iron was collected.
6.Take the plastic bag off the magnet to separate iron from the magnet.
Results:
the results were that the iron filings were successfully removed from the mixture.
Discussion:
1. Describe in your own words how this technique separates the mixture.
This technique separates the iron from the mixture by picking up the iron with the magnet using negative and positive charges.
2. Which substance has been separated from your mixture? (you may include a photo)
The substance that has been separated is the iron filing.
3. How successfully did you carry out this technique? Was there any limitations or improvements in this separation technique?
We carried out this technique very well. Except taking the iron off the magnet was difficult. So we could have thought of a better way to get the iron filings off.
4. Describe any safety issues there were when completing this experiment.
The iron was sort of sharp so being careful when taking it off the magnet.
scientific diagram
removing saw dust
Aim: To separate the sawdust from the sand and salt.
Materials: -Water warm
-Beaker 250mL or Pot
-Mixture
-Spoon
-Sieve
Method: 1.Fill beaker with water up to 150mL
2.Hold the sieve over the beaker.
3.Pour some mixture through a sieve, and shake
4.Keep pouring the mixture in the sieve bit by bit until all of it is gone.
5.Put the sawdust into a plastic bag.
Keep the water and mixture inside the beaker.
Results: we had some trouble as the saw dust didn't actually float it was suspended in the water so we did have to change the way we did it and the second way turned out much better.
Discussion:
1. Describe in your own words how this technique separates the mixture.
This technique separates the mixture, by the sand going through the sieve and then the sawdust being too big to go through the sieve.
2. Which substance has been separated from your mixture? (you may include a photo)
The substance that has been separated from the mixture is the sawdust.
3. How successfully did you carry out this technique? Was there any limitations or improvements in this separation technique?
The decision was going to be decanting but that did not work out at all so the other plan was going to be using a sieve.
4. Describe any safety issues there were when completing this experiment.
There weren’t really any safety concerns because it was only a sieve and some and saw dust.
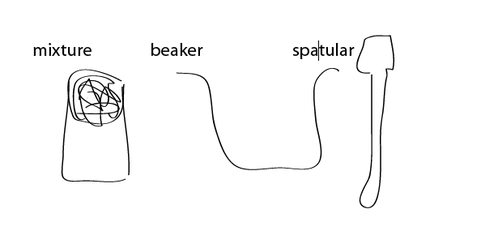
scientific diagram
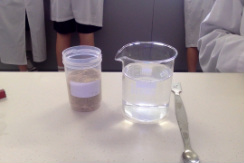
removing the sand
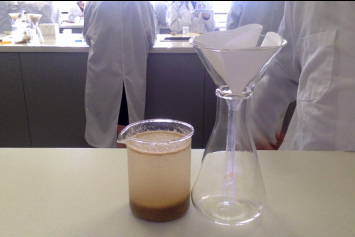
Aim: To separate the sand from the salt and water.
Materials: -Beaker already with water and mixture
-Conical flask
-Filter Funnel
-Filter paper
Method: 1.Fold the filter paper into a cone shape and place inside the filter funnel.
2.Place the filter funnel in the top of the conical flask.
3.Pour the mixture and water that is inside the beaker into the filter funnel carefully make sure not to pour through the outside of the paper.
Results:
the sand was successfully separated
Discussion:
1. Describe in your own words how this technique separates the mixture.
It separated by the water going through the filter paper leaving the sand behind, the water then goes into the conical flask.
2. Which substance has been separated from your mixture? (you may include a photo)
The sand has been separated.
3. How successfully did you carry out this technique? Was there any limitations or improvements in this separation technique?
You cant put it all in straight away otherwise the water will overflow and go every where.
4. Describe any safety issues there were when completing this experiment.
There weren’t really any issues because it was only paper and some glass that we used and neither of those things are really dangerous.
scientific diagram
separating salt
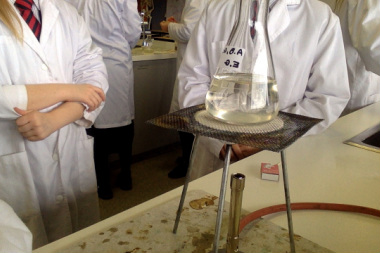
Aim: To separate the salt from the water.
Materials: -Bunsen Burner
-Tripod
-Evaporating dish
-The conical flask that contains the mixture in it.
-Gauze mat
Method: 1.Place Bunsen burner on the mat and plug into the gas tap.
2.Put tripod over the Bunsen burner then turn on the Bunsen burner.
3.Place gauze mat over tripod.
4.Pour some of the mixture that is inside the beaker into the evaporating dish.
5.Place evaporating dish on gauze mat.
6.When some of the mixture has evaporated add more until the beaker is empty.
Results:
the salt was successfully separated but, the evaporating process took a very long time.
Discussion:
1. Describe in your own words how this technique separates the mixture.
The water evaporates and this leaves the dissolved salt because salt doesn’t evapourate.
2. Which substance has been separated from your mixture? (you may include a photo)
The salt has been.
3. How successfully did you carry out this technique? Was there any limitations or improvements in this separation technique?
The only problem was how long it took to evaporate. But other than that it was pretty easy.
4. Describe any safety issues there were when completing this experiment
The Bunsen burner’s flame is very HOT. Also you have to be careful when lighting a match.
scientific diagram
Conclusion
We learnt that saw dust does not float so we did have to change our separation technique from scraping it off the top of the water to putting it through a sieve. The only thing I can think of to make it better is if we had not put water in until after doing the sawdust. We also learnt that water takes a while to evaporate so we could have put less water in it so it that it wouldn’t take as long.
